Showing posts with label how to make. Show all posts

Friday, January 16, 2015

How to make vegetable sushi nori


When I was a PhD student, I was fortunate to be awarded a scholarship for a study trip to Japan. 

There, I visited all the key University labs and Research Institutes working in my field of research.

Beforehand, I'd bought a Railcard and had planned to stay in Youth Hostels over the country. 

Due to the extraordinary hospitality of my academic contacts, however, I ended up staying with different Japanese families for the entire time, which was a real privilege.

I'll never forget one evening in the home of a Professor at the University of Okayama. His wife and three young children all sat round the kitchen table making sushi rolls, which we later ate for supper.

The children were so excited to meet an English person and thrilled to show me their food and customs. It was magic.

In Japan, making sushi is considered a vocation, an art form, and chefs, or itamae, train with almost military rigour for anything from 2 to 20 years to become proficient.

Traditionally, raw fish is used in sushi and cutting it up in the correct way appears to be akin to learning to perform brain surgery.

Even the preparation of rice is a precise procedure. Too much rice and it will be more than a mouthful; too little and it will be overpowered by the fish; too much pressure and it will be hard; too little and the pellet will fall apart.

Most of us don't aspire to the heights of becoming a senior sushi chef, so we can relax and enjoy creating simple vegetable sushi rolls, which are great for lunchboxes, snacks, picnics and parties. 

This recipe for sushi rolls uses the sea vegetable known in Japanese as nori (Porphyra spp).

Nori is the most popular of all sea vegetables as it's versatile and easy to prepare. It has a sweet and salty taste. 

Nori contains more protein than other sea vegetables, averaging a remarkable 40% by weight.  It contains about 1.5 times more vitamin C than oranges and as much vitamin A as carrots.  Nori is the only sea vegetable reported to contain the biologically active form of vitamin B12. The mineral content of nori is about 10% by weight, which is lower than other sea vegetables, but is still very high for a vegetable food.  

Sea vegetables have numerous health benefits and are valuable for boosting mineral intake in your diet.

Nori is sold either as flakes or as sheets, which are folded 7 or 10 to a pack.  

The flakes don't require soaking or cooking and can be sprinkled directly onto grains, or incorporated into purées, batters, sauces, dressings and dips to give an appealing herb-like flavour.  

Nori sheets are best lightly toasted before use.  This is done by rotating the sheet, shiny side up, over a low flame for a few seconds until its colour changes to a lighter green.  Pre-toasted nori sheets are also available in the shops.  Once toasted, nori can simply be torn into smaller pieces or cut with scissors into attractive shapes.  These pieces can be added as a garnish to cereal dishes, soups and salads or mixed with nuts and seeds to make a tasty snack.  Toasted sheets of nori can also be used to make sushi rolls and rice balls.

Ingredients

Makes 2 sushi rolls, at least 3 servings

  • 2 sheets nori sea vegetable, toasted
  • 1 cup short-grain brown rice
  • 2 cups boiling water
  • 1 tbsp brown rice vinegar
  • 1 tbsp rice malt syrup
  • 1 tsp peanut butter
  • ½ tsp umeboshi plum paste (available online or in health food stores)
  • 1 carrot (100g/4oz), finely sliced
  • 1/3 raw cucumber (100g/4oz), finely sliced
  • ¼ red pepper (30g), finely sliced
  • 50g/2oz marinated tofu, finely sliced
  • Few pieces of sushi ginger or 1 tsp mustard 


Method


Add 1 cup short-grain rice and 2 cups boiling water to a thick-based pan, cover with a lid and bring to a boil. 

Turn down to a very low heat and simmer for 40-45 minutes until water has evaporated and rice is soft. 

Mix brown rice vinegar and rice malt syrup together and stir into rice. 

Allow to cool. You need to use short-grain rice as this sticks together, unlike long grain or basmati rice.


You can buy nori sheets already toasted. 


If you have untoasted nori, simply hold the rough side of each sheet over a low flame for a few seconds until colour changes to a lighter green. 


Cut the carrot and cucumber into fine strips. I cut the vegetables thinly on the diagonal and then slice the pieces into narrow strips.


Having prepared all the fillings, lay one sheet of toasted nori, shiny side down, on a bamboo sushi mat, with the stripping of the map running horizontally.


Spread 1 cup  cooked rice evenly over the nori, leaving 1/3 inch (1cm) at the bottom, nearest you, and 1 ½ inches (4 cm) at the top, firmly pressing the rice into the nori


Gently spread nut butter, umeboshi paste, carrots, cucumber, pepper, tofu and sushi ginger horizontally in a strip across the rice.

If you add too much filling, you'll find it difficult to roll the sushi up.


Pick up the edge of the bamboo sushi mat and carefully roll it away from you around the ingredients, into a cylindrical roll. 

Using your finger or a pastry brush, spread a little water on the exposed top edge of the nori to help the roll stick together.


You should end up with a cylindrical roll as in the photograph below.


Using a sharp knife dipped into water, cut the sushi nori roll into slices and serve garnished with chopped vegetables and salad.

You can create many variations with different fillings and flavours, just like sandwiches.  

For example, you can include avocado with lime juice; spring onions (scallions); bean sprouts; roasted sweet potato or squash; sesame seeds; toasted walnuts; shiitake mushrooms sautéed in soy sauce; mustard; wasabi; regular mustard; steamed broccoli pieces or asparagus.


~

If you've enjoyed this post and would like to keep in touch please sign up for my free email newsletter and get a free report on calcium and your health.

You can also visit my website and follow me on Facebook, Twitter, Pinterest and LinkedIn.

~

Nutrition information


Friday, May 23, 2014

How to make plant-based 'milks'


When I first started shifting to a plant-based diet, I found giving up dairy products quite a challenge, both intellectually and practically.

From an early age, I'd been told to drink milk to make my bones strong and help me grow. In fact, I was the milk monitor at primary school. 

I had trusted this advice and now I was reading scientific evidence suggesting that cow's milk is not really that healthy for humans, especially over the long term (1).

At a practical level, what could I consume instead?

Soy milk didn't agree with me. Besides, I was suspicious of a product which, despite food industry claims, has never been a staple in Asia, except in conditions of extreme food poverty; even then, the soybeans would be fermented first to improve digestibility (2).

Rice milk was subject to concerns about contamination with inorganic arsenic and the EFSA and the FDA recommended not giving it to very young children. 

Then I discovered plant-based 'milks'.

In supermarkets and health food shops you can buy all manner of non-dairy milks in addition to soy and rice, for example, quinoa, hemp, oat, almond and hazelnut.

These products are convenient and reasonably priced but there is a limited range available and they often contain considerable amounts of sugar and other additives.


Then I discovered you could make your own plant-based 'milks' very easily by blending raw nuts, seeds, and grains with water. 

Almonds, cashews, macadamias, Brazil nuts, hazelnuts, pecans, pistachios, coconuts, soybeans, hemp seeds, pumpkin seeds, sunflower seeds, sesame seeds, flaxseeds, quinoa, millet, rice, and oats can all be liquefied into delicious milks. 

Home made milks are tasty, fresh, free of additives and preservatives, and you can completely control the integrity of the product: the quality of the ingredients, the level of sweetness, and the texture.

So this is how you do it, using hazelnut milk as an example.

Recipe for hazelnut milk


Ingredients

Makes about 3 cups (750ml, 1.5pints)

  • 1 cup hazelnuts 
  • 4-5 chopped pitted dried dates
  • 3 cups filtered water
  • 1 pinch sea salt
  • 1 small squeeze of lemon juice (optional but I find it balances the flavour)


Method


STEP ONE - SOAK

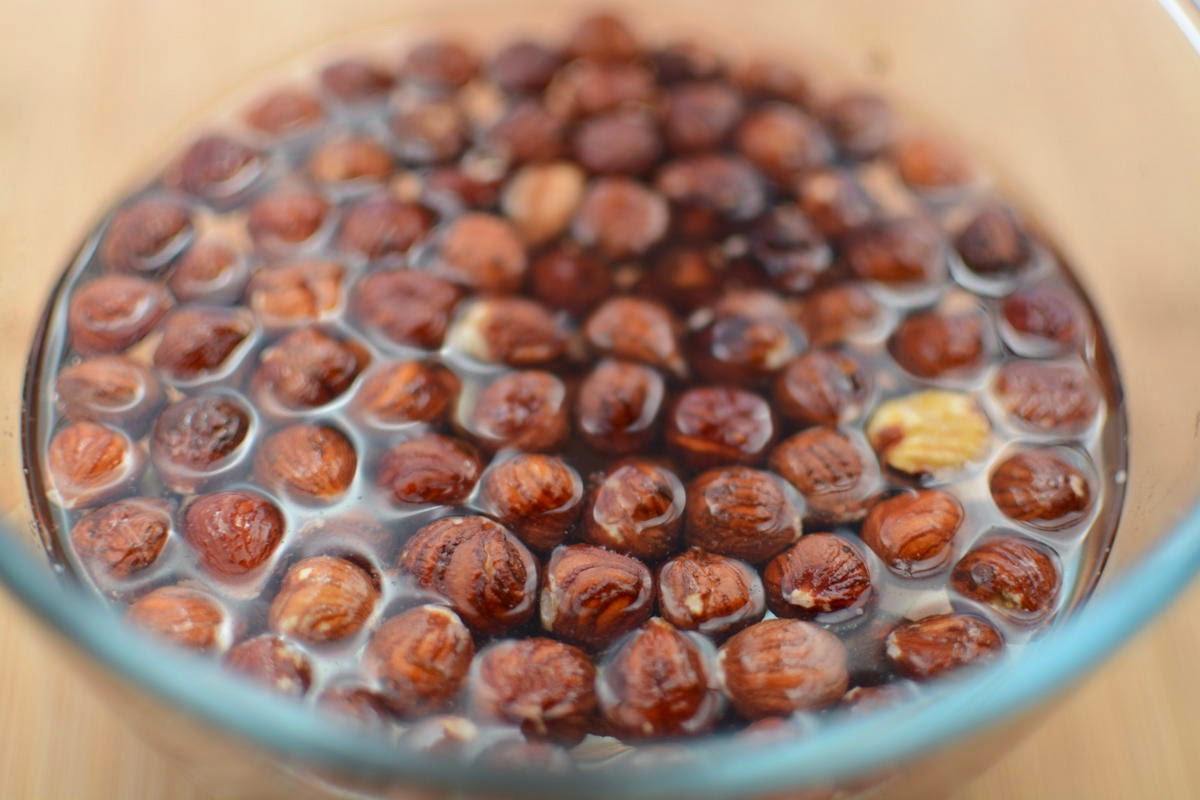
Soak nuts overnight in cold water. This makes them soft and easier to blend.

STEP TWO - BLEND

Drain soaked nuts and rinse in cold water, add the chopped dates, a pinch of salt, 3 cups of water and blend until smooth. 

I just use a simple hand blender, which is perfectly adequate if the nuts have been soaked. You can use a fancy machine like a Vitamix if you wish but it isn't really necessary.


STEP THREE - STRAIN and SQUEEZE

Pour contents of blender into a nut milk bag placed over a bowl or a jug.

A nut milk bag is just a piece of fine mesh nylon sewn together with a draw string. You can buy them online.


Squeeze the nut milk bag until as much liquid as possible has been extracted.


STEP FOUR - POUR

Taste the nut milk and add a dash of lemon juice if required. You'll learn what you like by experimenting.

Pour nut milk into Kilner (Mason) jars, or a jug with a lid, and store in the refrigerator for up to 3-4 days (if it lasts that long).

You will be left with fine nut grounds which you can put in a bag, freeze and use later in baking.


That's it. Simple, nutritious, no additives and with much more flavour than shop-bought nut milks.


You can apply the same method to other nuts, seeds and grains. Here's another example:

Quinoa milk


Ingredients

  • 1 cup uncooked quinoa
  • 2 cups water for cooking quinoa
  • 3-4 cups water for blending cooked quinoa
  • 1 pinch sea salt
  • 1 tsp vanilla extract

Method


STEP ONE - SOAK

Take 1 cup quinoa and soak overnight in cold water.

STEP TWO - COOK

The next morning, drain and rinse the quinoa.

Place the soaked quinoa in a pan with 2 cups of water, bring to a boil, cover with a lid and simmer for 15 minutes until soft and fluffy.

STEP THREE - BLEND

Place cooked quinoa in a blender with 3-4 cups filtered water. Blend until smooth.

Strain and squeeze through a nut milk bag.

Add a pinch of sea salt and 1 tsp vanilla essence.

Pour into storage jars or a jug and keep chilled in the refrigerator.

Variations


You can add other flavourings, for example:

Cinnamon
Cacao
Rice malt syrup
Dates

Uses


I use plant-based milks as drinks in their own right; on breakfast cereals and porridge; in smoothies; in desserts; and in savoury dishes which require a white sauce, such as dairy-free toppings for lasagne.

If I'm making a savoury dish, I'll choose one of the less sweet grains or nuts, such as oats or almond, and omit any added sweetness.

Hope you enjoy experimenting and do let me know how you get on by posting in the comments below.


If you have enjoyed this post and would like to keep in touch please sign up for my free email newsletter.

You can also visit my website and follow me on Facebook, Twitter, Pinterest and LinkedIn.


References


(1) Campbell, T.C. and Campbell, T.M. The China Study. Benbella Books, 2006.
(2) Shurtleff, W. & Aoyagi, A. History of soymilk and other non-dairy milks (1226 to 2013). Soyinfo Center, Lafayette, CA, 2013. ISBN 9781928914587